You’re about the find out.
Are you ready for another Spaight Street Syndicate installment? Daniel Hearn’s C Class Skeeter build enters the “sweeeet” phase.
Previously at the Spaight St. Syndicate
No hemi, but all sorts of other, hopefully, go-fast stuff under the hood.
Springboard attachment brackets. Not fast if your springboard falls off. First time I ever sailed an iceboat was Donny Anderson’s Nite on Lake Kegonsa. Springboard fell off. I didn’t know there was hazing before I joined the fraternity.
Rubber covered steering tube stops to avoid metal-to-metal thump if I max out (about 45 degree angle). Delrin guides for steering tubes and cable. Blue bungee routed through low-friction rings retracts brake.

All major mechanicals in between same bulkheads cavity, in case access is ever needed. Renegade-style steering using a go-cart sprocket attached to a hub I made. My technical consultant, Pat Heppert, recommended a 67-tooth to get the correct ratio between sprocket and steering wings on front chock, to balance force required and twitchiness. PVC tube guides chain which is connected to steering cable. Length is sized so that connection points never exit their respective tube when steering is maxed out in either direction. Steering post wings are connected to steering wheel sprocket with spliced Spectra line.

Adjustable length, rubber covered foot pedals. The bungeed blocks attached to the center stringer and sideboards maintain necessary tension. When using the Renegade-style steering on a shorter LOA front-seater boat, I discovered that the geometry gets messed up, causing too much slack in the rope that connects the steering post wings to the steering wheel sprocket, as the angles change from an isosceles triangle to an obtuse. And here I thought I’d never use my high school geometry! Wouldn’t want the chain to jump off the steering wheel sprocket.
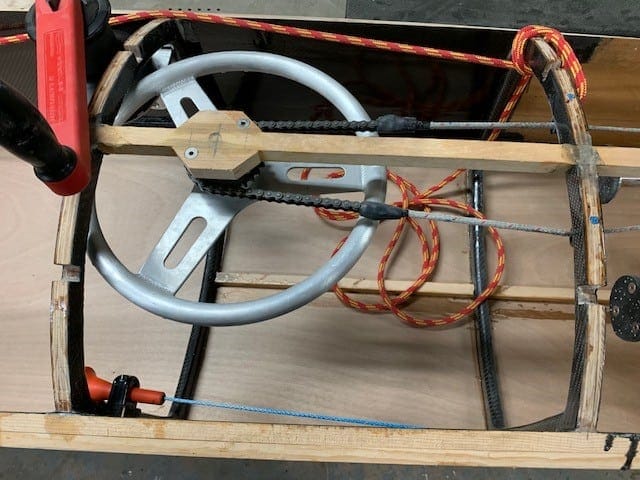
Lightweight, pre-fab, aluminum steering wheel normally used on Midget cars. Good-size diameter for easy turning in the pits. Close to zero drop to maximize leg space. Blue Spectra line attaches to brake. Salvaged the rubber handle from an old backpack blower. Wanted something that wouldn’t clank around in the cockpit. Positioned for easy grab with gloves on.
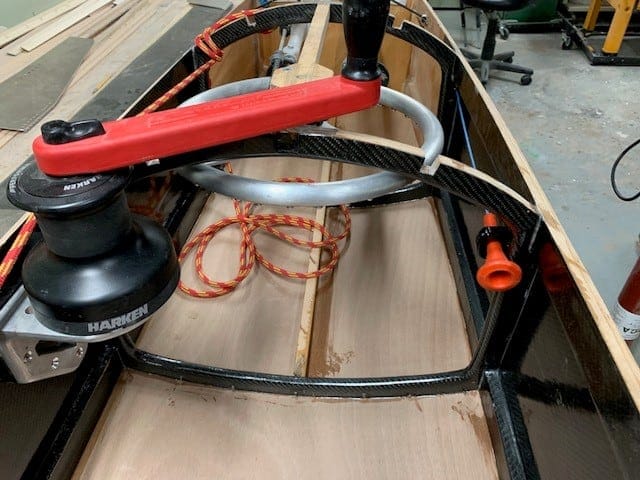
Harken two-speed winch for plenty of purchase. Planning to leave the vertical handle on to start, although I understand most of the Skeeter guys end up taking them off. In the most forward practical winching position, I don’t expect the vertical handle to contact the closed canopy. At least that’s what my rough fit canopy test is telling me.
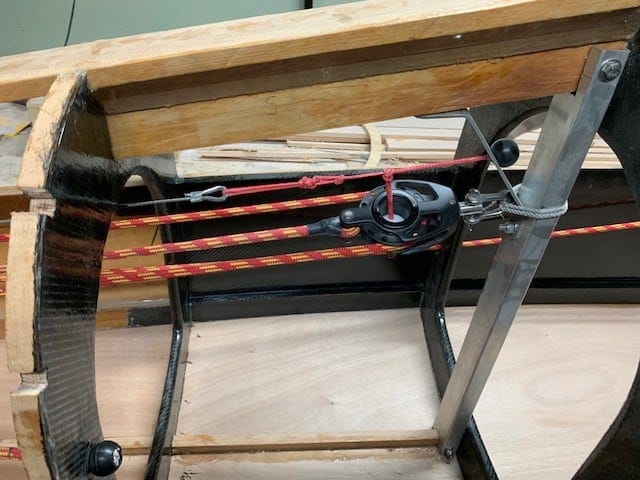
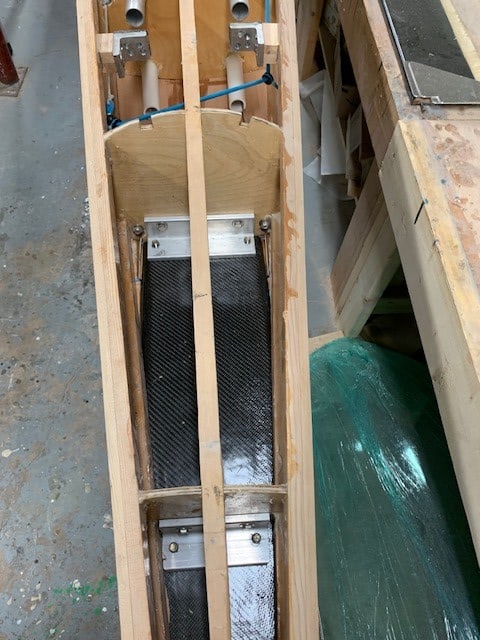
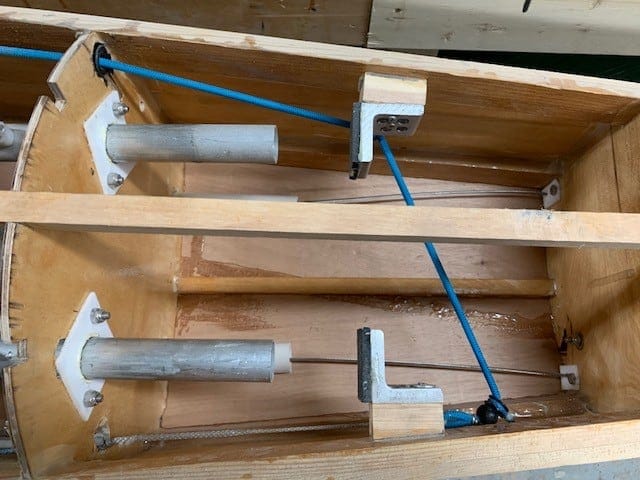
Rectangular aluminum tube serves dual purpose of anchor for blocks and seat back stud (back side of seat back will be attached to this). Added a stainless angle to reinforce. I’m using a cascading block system, but chose to deal with the “lazy” blocks by suspending them on a cable, rather than holding them up with a fabric “hammock” like the A-Skeeter guys are doing. This block doesn’t move, but the other two do, so they are suspended with from bullet blocks.
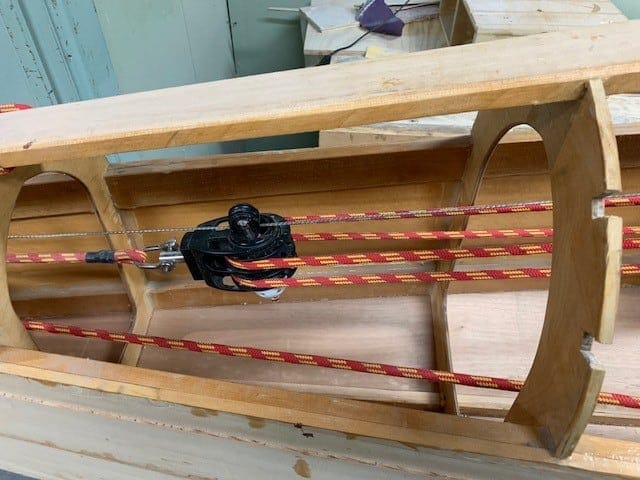
Here you can see how the blocks will move along the cable. They are held up from below with a golf whiffle ball. (I have nine more. Anybody need some?) The sheet routes through the aft cockpit bulkhead at a height which creates the optimum angle for the sheet rope entering the winch per Harken specs.
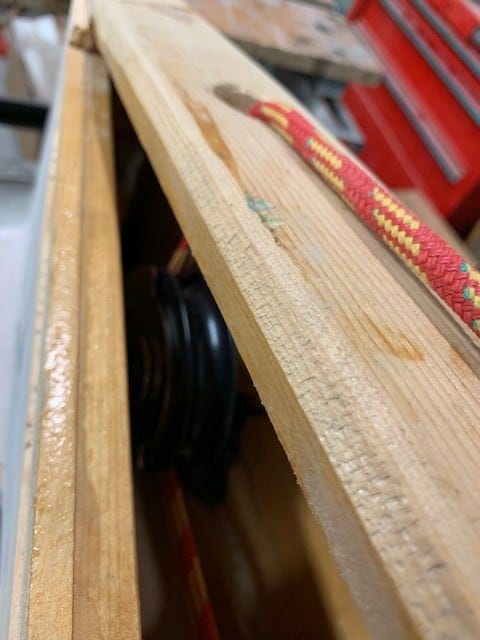
Tucked way in back is the exit block, which must carry the heavy load. This one can handle more force than the hull itself could withstand. It’s anchored in place with a titanium shaft reinforced with stainless steel plates on both inside and outside of both sideboards. Custom Delrin washers keep the block centered on the shaft. The shackle connecting the block to the shaft will allow it to rotate up and down if different sheet attachment positions on the boom change the sheet angle some. An oversize low friction ring will ultimately be epoxied into the “backbone” with a stopper ball preventing the sheet from dropping down into the hull.
That’s my show and tell for now, but I’ll leave you with the “Tip of the Week”—cutting Kevlar fabric requires a crazy sharp scissors. YouTube showed me how to turn an ordinary Fiskars into a Kevlar cutting machine!